Transforming a plain room into a cozy, sophisticated space often requires a bit of creativity and some manual work. One of the most popular ways to add character to a home is by installing a feature wall. If you have been wondering how to create a wooden panel wall with shelves? then you have come to the right place. This project not only adds visual depth but also provides functional storage for your favorite books, plants, or decor items. In this guide, we will break down the process into simple, manageable steps that anyone can follow.
Why Choose a Wood Accent Wall?
Wood brings a natural warmth that paint or wallpaper simply cannot match. It creates a tactile experience and acts as a beautiful backdrop for furniture. When you understand how to create a wooden panel wall with shelves? you gain the ability to customize your environment to fit your personal style. Whether you prefer a rustic farmhouse look or a sleek modern aesthetic, wood paneling is versatile enough to accommodate any design vision. Plus, it is a great way to hide wall imperfections or add extra insulation to a room.
Design Planning: How to Create a Wooden Panel Wall with Shelves?
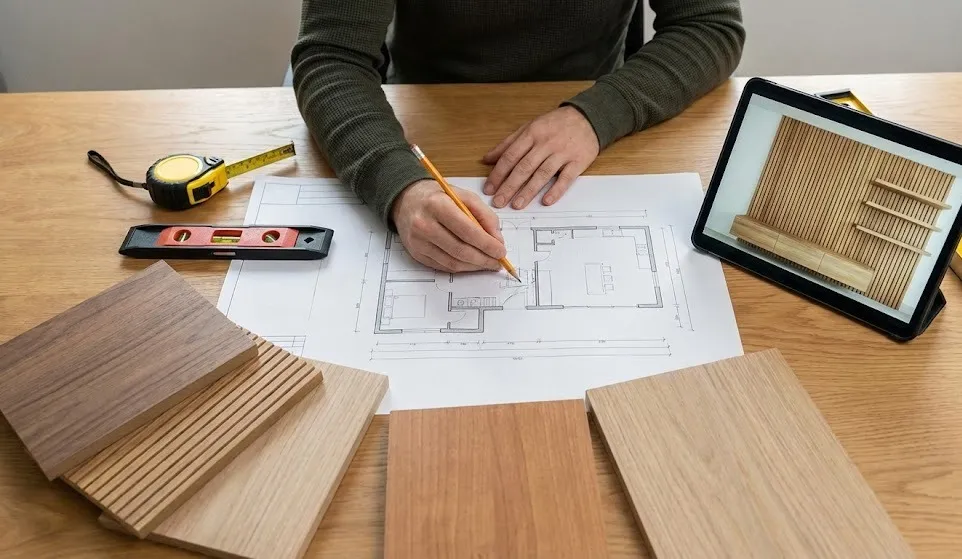
Before you pick up a hammer, you need a solid plan. Measuring your wall is the most critical step. You need to calculate the total square footage to determine how much timber you will need to purchase. When thinking about how to create a wooden panel wall with shelves? consider the weight of the items you plan to display. This will dictate the type of wood and the mounting hardware you choose. It is often helpful to draw a rough sketch on the wall using a pencil or painter’s tape to visualize the final layout.
Essential Tools and Materials
To ensure a professional finish, make sure you have the following items ready:
- Wood Planks: Cedar, Pine, or Oak are popular choices for their grain patterns.
- Shelving Boards: Thicker wood is usually better for the shelving components.
- Level and Tape Measure: Accuracy is key for a straight wall.
- Stud Finder: Essential for finding the strongest points in your wall.
- Nail Gun or Construction Adhesive: To secure the panels.
- Sandpaper and Wood Finish: To smooth and protect the wood.
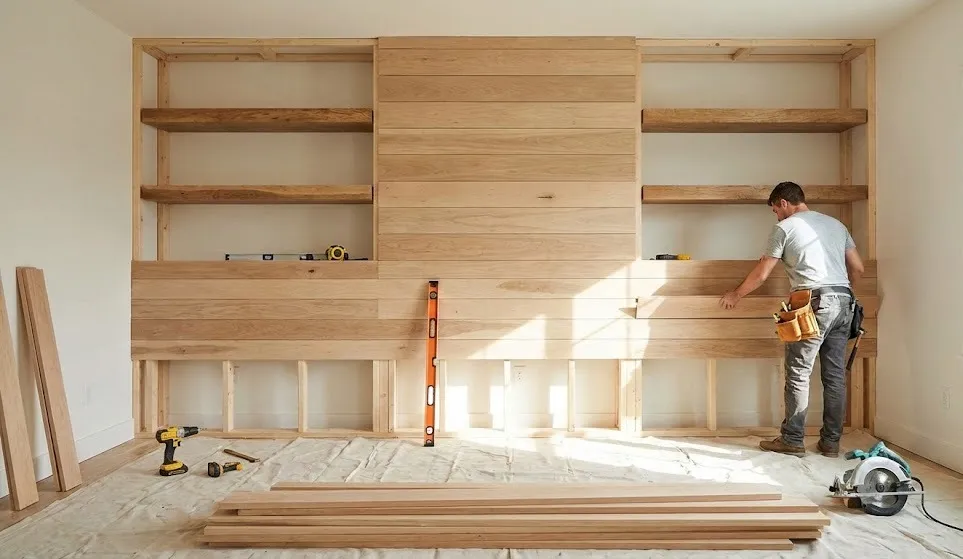
Step-by-Step Installation Guide
The actual assembly process is where your vision starts to come to life. Begin by removing any baseboards or outlet covers so the wood can sit flush against the wall surface. The secret to how to create a wooden panel wall with shelves? is starting from the bottom and working your way up. This ensures that the bottom row is perfectly level, acting as a foundation for the rest of the planks. Apply a zigzag pattern of adhesive on the back of each board and secure it with a few nails into the wall studs.
As you move upward, check for level every few rows. If your house is older, your walls might not be perfectly square, so small adjustments may be necessary. Learning how to create a wooden panel wall with shelves? also involves managing corners and edges. Use a miter saw to cut boards at a 45-degree angle for a seamless transition between walls. This small detail separates a basic DIY project from a professional-grade installation.
Integrating the Shelving System
The shelves are the highlight of this project. You have two main options: floating shelves or bracketed shelves. To maintain the clean look of how to create a wooden panel wall with shelves? many people prefer hidden brackets. These are installed directly into the studs before the panels go up, allowing the shelf to slide over them. If you prefer a more industrial look, you can use exposed metal brackets that contrast beautifully with the natural wood grain.
Ensure that each shelf is perfectly horizontal. Even a slight tilt can cause items to slide off or make the entire wall look lopsided. When you master how to create a wooden panel wall with shelves? you can even experiment with different shelf lengths and staggered placements to create a more dynamic and artistic appearance. This “asymmetrical” look is very popular in modern interior design.
Finishing Touches and Styling
Once the wood is up and the shelves are secure, it is time for the finishing work. Fill any nail holes with wood putty that matches your timber color. Sand the entire surface to remove any splinters or rough patches. A good set of tips for how to create a wooden panel wall with shelves? always includes high-quality sealing. You can use a clear polyurethane to keep the natural color or a dark stain for a more dramatic, royal effect.
After the finish has dried, you can start styling. Mix and match different textures on your shelves. Place soft green plants next to hard ceramic vases or vintage metallic clocks. The contrast between the organic wood and these decorative elements will make your new feature wall the focal point of the entire house.
Conclusion
Taking on a home improvement project can feel intimidating, but the results are always worth the effort. By following the steps outlined above, you now have the knowledge of how to create a wooden panel wall with shelves? and can start planning your own renovation. Remember to take your time with the measurements and always prioritize safety when using power tools. With a little bit of patience and some high-quality wood, you can create a stunning feature wall that adds both value and beauty to your home for years to come.