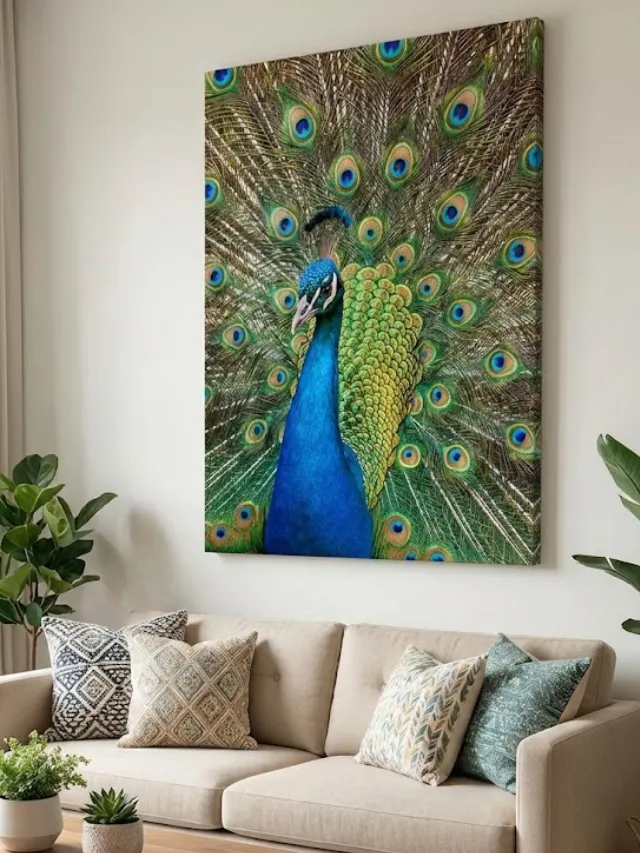
There is something truly magical about the peacock. With its iridescent blue neck and that magnificent train of emerald-green feathers, it is one of nature’s most beautiful creations. For many artists, capturing this beauty on canvas feels like a dream, but it can also feel a little intimidating. All those details and shifting colors can look complicated.
However, I have good news for you. Painting peacock in acrylic is much easier than it looks when you break it down into simple, manageable steps. Acrylic paint is the perfect medium for this subject because it is forgiving, dries quickly, and allows you to layer those vibrant colors to create a glowing effect.
In this guide, I will walk you through the entire process. Whether you are a complete beginner or someone looking to refine their skills, we will explore how to mix the perfect teals, create the texture of feathers, and bring this majestic bird to life.
Why Choose Acrylics for Peacocks?
Before we pick up a brush, let’s talk about why we are using acrylics. When painting peacock in acrylic, you get a distinct advantage over oil or watercolor. Peacocks are all about bold, opaque colors and layering.
- Fast Drying: You can paint the dark background and layer the bright feathers on top within minutes.
- Vibrancy: Acrylic pigments are intense, which is exactly what you need for that electric blue and neon green.
- Correction: If you paint a feather in the wrong spot, you can simply wait for it to dry and paint right over it.
Gathering Your Art Supplies
To get the best results, you don’t need the most expensive equipment, but having the right colors is crucial. Here is what you will need:
1. The Canvas
A rectangular canvas works best for a peacock to accommodate the long tail. A 12×16 inch or 16×20 inch canvas is a great starting size.
2. The Brushes
You will need a variety of sizes:
- Flat Brush (Large): For the background.
- Filbert Brush (Medium): For the body of the peacock (the rounded edge helps with feathers).
- Round Brush (Small/Detail): For the eyes and fine details in the tail feathers.
- Fan Brush (Optional): This is a secret weapon for creating wispy feather textures easily.
3. The Colors
This is the most important part of painting peacock in acrylic. Standard colors won’t quite capture the magic, so ensure you have these specific shades:
- Phthalo Blue: This gives that deep, intense blue.
- Phthalo Green: Essential for mixing rich teals.
- Sap Green: For the natural, grassy look of the feathers.
- Titanium White: For highlights and mixing.
- Mars Black: For the background and deep shadows.
- Metallic Gold or Bronze: Peacocks have a natural shimmer; a little metallic paint makes a huge difference.
- Purple/Violet: To add depth to the blue feathers.
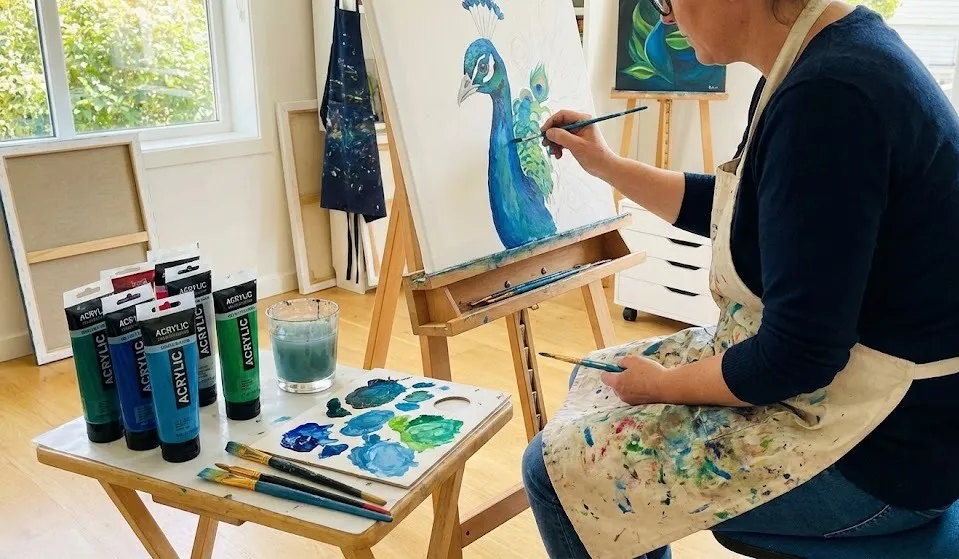
Step-by-Step: Creating Your Masterpiece
Now, let’s get into the creative process. Put on some relaxing music, pour yourself a cup of coffee (or tea), and let’s start painting.
Step 1: Prepare the Background
Peacocks are bright and flashy. To make those colors pop, you need a high-contrast background. I highly recommend painting your canvas a dark color first. A deep charcoal grey, dark navy, or even plain black works wonders.
Cover the entire canvas and let it dry completely. This dark base will make the electric blues and greens you apply later look incredibly vibrant.
Step 2: The Sketch
Don’t stress about being a perfect drawer. Using a piece of chalk or a white charcoal pencil, lightly sketch the outline of the bird.
- Draw a small oval for the head.
- Connect it to a long, S-shaped neck.
- Draw a larger oval for the body.
- Sweep a long, flowing shape down for the tail feathers.
Step 3: Blocking in the Body
Start with the neck and chest. Mix your Phthalo Blue with a tiny touch of Phthalo Green and a bit of White. This will create that classic “peacock blue.”
Apply this color to the neck and body. While the paint is still wet, add a little pure Phthalo Blue to the shadowed side (usually the left) and a little more White to the center of the chest to create a rounded, 3D effect.
Step 4: The Tail Feathers (The Base Layer)
The tail is the showstopper. Start by mixing Sap Green with a little black to make a dark green. Using your filbert brush, paint long, sweeping strokes starting from the body and flowing down to the bottom of the canvas.
Once that dark base is dry, take a lighter green (mix Sap Green with Yellow) and add more strokes on top. This is the secret to painting peacock in acrylic, it is all about layering lights over darks.
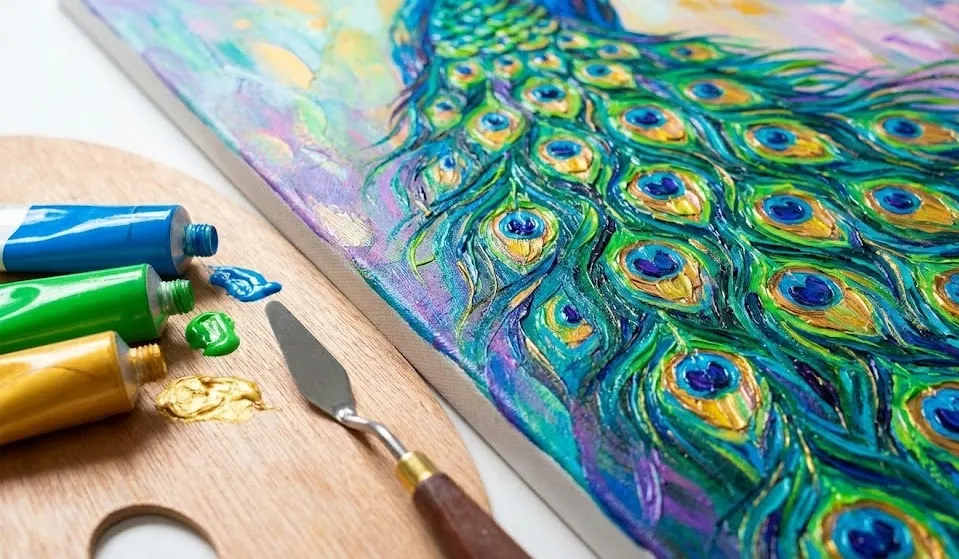
Step 5: Painting the “Eyes” of the Feathers
This is the most detailed part, but also the most fun. The “eyes” on the tail feathers are what make a peacock recognizable. Scattered across the tail area, paint these shapes in this order:
- The Shape: Paint a small, messy oval using a bronze or copper color.
- The Center: Inside that oval, paint a smaller heart or bean shape in deep blue.
- The Surround: Surround the bronze oval with a ring of turquoise (mix blue, green, and white).
- The Wisps: Using your smallest brush or a liner brush, pull tiny lines outward from the eye to make it look like individual hair-like feathers.
Step 6: Adding Texture and Highlights
Now that the main colors are down, step back and look at your painting. Does it look flat? It probably needs some texture.
- Dry Brushing: Dip a dry brush into a light teal or lime green color. Wipe most of the paint off on a paper towel, then lightly drag it over the tail feathers. This catches the texture of the canvas and looks exactly like fluffy feathers.
- The Crown: Don’t forget the little crest on the peacock’s head! Use your detail brush to paint thin lines sticking up from the head, topped with tiny blue dots.
- The Real Eye: Paint the bird’s actual eye using black, with a tiny white dot to represent the reflection of light. This brings the bird to life.
Tips for Success with Acrylics
If you are new to this medium, here are a few human-to-human tips I’ve learned over the years while painting peacock in acrylic:
- Keep Water Handy: Acrylics dry fast. Keep your brushes wet when not in use so the paint doesn’t harden on the bristles.
- Don’t Over-blend: Peacocks have texture. If you blend the colors too smoothly, it will look like plastic. Let the brushstrokes show!
- Metallic Magic: If you have metallic gold paint, dilute it slightly with water and glaze it over the feathers after everything is dry. When the light hits your painting, it will shimmer just like a real bird.
Conclusion
Creating art is about the journey as much as the result. When you are painting peacock in acrylic, you are learning how to control color, how to build layers, and how to have patience with details.
Don’t worry if your first attempt doesn’t look like a photograph. The beauty of a painting lies in your unique brushstrokes and your interpretation of the colors. So, grab your paints, have fun with those greens and blues, and unleash your creativity. You might just surprise yourself with how beautiful your peacock turns out to be.